How To Draw Blood Step-By-Step
Learning how to draw blood is essential to becoming a phlebotomist.
And, in order to do so, one must learn and follow the proper steps to collecting blood - from gathering the right equipment to transporting the sample to the laboratory.
This fun and informative guide details the step-by-step process of taking a blood sample and makes a great reference for students and seasoned professionals alike.

Important: This is a general guideline and may vary depending on institutional policies, patient condition, and specific requirements of the blood test. Always refer to the standard operating procedures of your healthcare facility.
Step 1: Gather Equipment
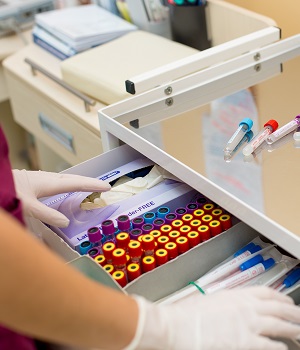
Gather the necessary equipment and tools used to perform the blood draw and place them on a tray that's within reach.
Typically, this may include (but, not limited to):
- Blood collection tubes
- Non-sterile gloves
- An assortment of needles and syringes of different sizes
- Tourniquet
- Alcohol and alcohol swabs
- Gauze or cotton balls
- Laboratory forms and blood-specimen labels
- Transportation bags and sharps container
Step 2: Prepping The Patient

Once you have the necessary supplies, it's time to ready the patient.
- First, introduce yourself and ask for the patient's full name.
- Double check that the patient's name matches the name on the lab form.
- Ask if the patient has any allergies or has had any issues or complications during previous blood draws.
- Make the patient comfortable if you sense any anxiety or fear.
- Ask the patient to extend their arm and place a clean towel or paper underneath.
- Explain the blood draw procedure and get verbal consent.
Step 3: Prepare Your Hands

Proper hygiene is essential to safely performing venipuncture.
Be sure to wash hands with soap and water and dry with a clean, single-use towel.
Depending on workplace procedure, you may be able to clean hands with alcohol rub if they are not visibly contaminated
After cleaning your hands you may now put on non-sterile gloves.
Step 4: Locate The Vein
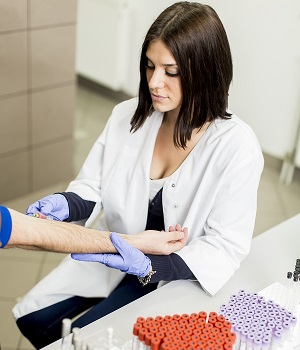
- Apply the tourniquet 3 to 4 inches above the venipuncture site.
- With the patient's arm extended, inspect the antecubital fossa.
- Look for a visible, good-sized vein.
- Use the pads of your index and middle fingers to gently palpate the arm. Apply enough pressure to indent the skin but not so much that you collapse the vein. Feel for veins that are springy, round, and full.
- Tip: Check both arms. The median cubital vein is typically the first choice, with the cephalic vein being second. The basilic vein increases the risk of damaging a nerve or artery and is typically more painful.
Step 5: Disinfect Site
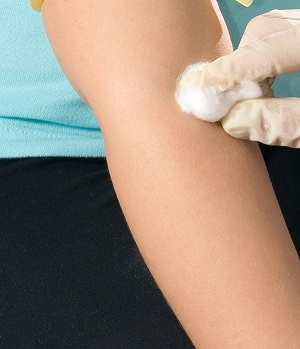
It's important to disinfect the site before drawing blood to reduce the chances of contamination.
- Cleanse the site with a 70% alcohol pad by starting from the center of the venipuncture site and working outwards, covering roughly 2-4 cms
- Be sure to allow the area to dry (do not blow the area dry).
- Be sure to NOT touch the disinfected site. If site has been touched or contaminated, repeat the cleaning process.
Step 6: Draw Blood
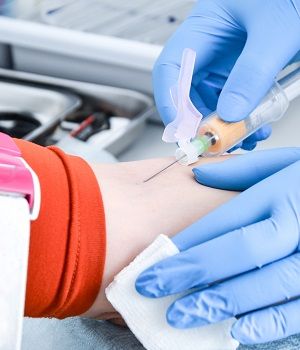
Perform venipuncture using the following steps:
- Place your thumb BELOW the venipuncture site to retract the skin. Be sure not to touch the venipuncture site or you will need to repeat the cleaning process.
- Puncture the vein quickly and at a 15 to 30 degree angle, with the bevel of the needle pointing up.
- The blood should start filling the tube. If it is not, you can either push the needle in further or gently back it out a bit to get the blood flowing. Do not redirect, or fish, the needle around while it is in the arm!
- Once the blood has been collected, first release the tourniquet. Be sure to do this before removing the needle from the vein.
- Slowly withdraw the needle and gently apply pressure to the puncture site with a clean gauze or cotton ball. Have the patient hold the gauze or cotton on the site with their arm extended.
Important: Be sure to follow the correct order of draw to avoid cross-contamination of additives.
Step 7: Complete The Procedure
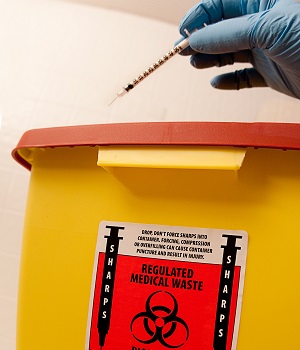
- Discard the used equipment into a puncture-resistant container (typically a Sharps container).
- Double check that the labels and forms are completely and accurately filled out.
- Perform a check on your patient by asking how they feel and checking the insertion site to confirm it's not bleeding.
- Thank the patient and let them know that the procedure is now completed.
Step 8: Prepare Blood Samples
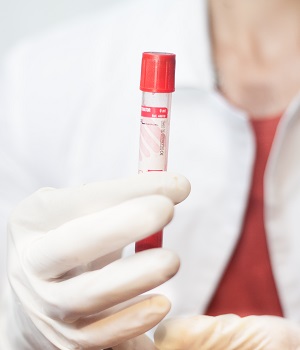
Place the collected samples into a plastic sealed and leak-proof bag for transportation.
Place any forms in an outside pocket or compartment to reduce the risk of contamination.
Share this page as an infographic! Simply copy the code below and paste it into your website.
Reviewed on September 23, 2023